Wednesday, January 26, 2011

All hail, kale!

Recently I have become obsessed with kale! It's incredibly healthy and delicious. In fact, 1 cup of cooked kale, or 2-3 cups of raw kale contains only 33 calories while also contributing an astounding 137% of the daily value of vitamin A, 100mg of Omega-3s (a big plus for non-meat eaters), and 3g of fiber! Kale comes in many varieties, most of which can be dated back over two-thousand years. Most kale recipes tend to focus on cooked preparations of kale, but I have recently discovered the tastiness of raw kale which is highlighted in the two recipes below. Enjoy!!

Dinosaur kale, also known as lacinato or black kale
Kale Caesar Salad - serves 4

Ingredients:
2 bunches of dinosaur kale, also known as lacinato kale or black kale
2 cups of croutons, preferably homemade from day old bread (recipe below)
1/2 cup freshly shaved parmigiano reggiano cheese
2 lemons   
3 cloves of garlic
1/2 can of anchovies packed in olive oil, drained
1 egg yolk
1 tablespoon white balsamic vinegar
1/2 cup olive oil
Croutons
3-4, 1 inch thick slices of day old bread, torn into small pieces - I used olive bread, but you can use any kind you like.
1 tablespoon fresh rosemary, diced
1 tablespoon olive oil

Preheat the oven to 400 degrees F. In a bowl, toss the torn bread with the olive oil and rosemary. Spread the bread evenly on a baking sheet and bake until golden brown and crisp, about 15 minutes. Turn the croutons halfway through to ensure even browning.

Instructions:
Dressing
Grate the zest from the lemons. Cut both lemons in half. Place the garlic, anchovies and lemon zest in a small bowl or mortar if you have one. Press with a large spoon or pestle and pound to make a thick paste. Add the egg yolk, a pinch of salt and a the juice from one and a half of the lemons. Add the vinegar. Whisk thoroughly to combine. While continuing to whisk, slowly pour in the olive oil. Whisk until smooth and creamy and slightly thickened. Taste the dressing and add more lemon juice to taste. You can make the dressing up to two days ahead of time.

Salad Assembly
In a large bowl, combine the kale and croutons. Pour dressing over the mixture and toss to coat. Add the cheese, toss again and serve.


Green kale, also known as curly kale
Massaged Kale 
This recipe was given to be by my co-worker, Amy. Since amounts are not specified, this recipe should be used as a guideline. The amounts of all ingredients can be altered to suit your own personal taste.
Ingredients:
1 bunch of green kale, also known as curly kale
Sesame oil and salt, to taste
2 celery stalks, diced
2 large carrots, shredded
1 tablespoon fresh ginger, grated using a microplane
Agave nectar, to taste

Dressing
2 tablespoons shallot, diced very small                                                                                         
Rice vinegar, to taste
Lemon juice, to taste
1 teaspoon dijon mustard, I like to use Sierra Nevada Pale Ale mustard
Sesame seeds, toasted are preferred
Sesame oil

Instructions:

Rip or cut the kale off of its' thick stem and put that in compost (the thick stem part). Break or cut remaining kale into small pieces and set in a bowl. Drizzle the kale pieces with salt and oil and massage in small handfuls until well moistened. Squeeze out excess liquid and put in separate bowl. Add diced celery and shredded carrot and grated ginger. In a separate small bowl, make a dressing with shallot, sesame oil, rice vinegar, lemon juice, and the mustard. Add sesame seeds. Pour the dressing over along with a drizzle of agave nectar and toss...mmmmmmmm.

Sunday, January 9, 2011

Kale, Mushroom, and Swiss Quiche

Are you often asking yourself 'what can I possibly make for dinner that is healthy, filling, contains whole grains and at least two servings of veggies?' Okay, so maybe that's not the exact question you ask, but you get the idea. Quiche is one of those amazing all-in-one meals that fits all of the above criteria, if done right. I made a delicious mushroom, kale, and swiss quiche for dinner a few nights back. I got a late start on making dinner and I was starving by the time it was ready, so I didn't get a chance to take a picture, but the recipe is below. If you stick with the crust and custard recipe I've provided, you can change up the filling anyway you like - just make sure you end up with at least 3-4 cups of filling (always lightly saute`ed) to put into the pie plate.

Ingredients:
Pie Crust
1/2 cup unbleached, all purpose flour
1 cup stone ground, whole wheat flour
6 tablespoons unsalted butter
4 1/2 tablespoons of milk

Filling
Enough olive oil to coat the saute' pan
2 cloves garlic, minced
4-6 ounces low fat chicken sausage (I used whole foods pesto chicken sausage from the meat counter)
2/3 bunch dinosaur kale (the kind with the bumps on it), chopped small
8 oz brown mushrooms, sliced
1/2 teaspoon dried red pepper flakes, or to taste
1 teaspoon dried basil
1/2 tsp granulated onion powder, optional
Salt and pepper, to taste

Cheese
6 slices jarlsberg lite swiss cheese

Custard
3 large/jumbo eggs
1 1/4 cups skim milk

Instructions:
1. Preheat oven to 375 degrees F.

2. Combine butter and flour in food processor and turn on machine until mixture is uniform throughout. While the machine is still running, add the milk 1 tablespoon at a time. You may need slightly more or less milk, depending on the humidity in your environment. Once mixture has come together, turn off food processor and remove. Hand form pie crust in an 8 or 9 inch pie plate.

3. Coat a large skillet with olive oil. Over medium heat, saute` garlic and chicken sausage for 5 minutes until sausage is about half way cooked. Add all other filling ingredients and saute` for 8-10 minutes until kale is wilted and veggies are tender. It is fine if the sausage is not fully cooked.

4. Layer cheese on top of crust in pie plate.

5. Pour warm filling over cheese.

6. Whisk eggs and milk together in a medium sized bowl.

7. Pour custard mixture over filling.

8. Bake in preheated oven for 37-42 minutes, until custard no longer jiggles when pie plate is bumped.

9. Remove from oven and allow to cool for 10 minutes. Cut into 6 slices and serve!

Tuesday, January 4, 2011

2011 - The Year of Fresh!

 I have many resolutions for 2011:

1. Run more
2. Wake up earlier (I am embarrassed to put the average time I woke up during 2010 in writing, but let's just say the roosters were up way before I even considered rolling my lazy butt out of bed)
3. Finish my MPH degree
4. Go to Europe!

While all of these are great, my number one resolution is to make healthy, fresh foods every day! Take a look at what I have in mind...


The beginnings of a fresh, raspberry lemon tart
Sweet potato and broccoli salad

Nectarine pie - vegan!   


Green salsa with fresh avocado and cilantro!

2010 - The Classics

The year 2010 was one of both tasty meals and infrequent blog posts. Take a look at some of the yummy dishes Tristan and I threw together. It is my hope that 2011 will be filled with overwhelmingly delicious and numerous gastronomic experiences...any many more blog posts. Stay tuned!!
Cheese Lasagna with Broccoli


Goat Cheese and Tomato Crostini with Balsamic Reduction

Vanilla Cake with Fresh Strawberry Mousse

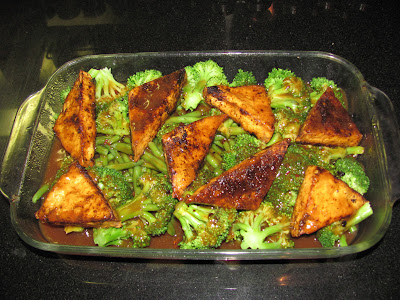
Baked Teriyaki Tofu and Broccoli

Cranberry, Apple, and Brie Sammie

Pulled BBQ Chicken Sammie with Citrus Mango Slaw

Tuesday, April 6, 2010

Dal: Indian Spiced Red Lentil Soup with a Kick!

Since moving to San Francisco, Indian cuisine has become one of my favorite genres of food. Everything about Indian food makes me feel all warm and fuzzy inside and gets my tummy grumbling away. Chicken Tikka Masala and Palak Gosht, a super hot (I'm talking 4 jalapenos with seeds kind of hot) lamb and spinach dish are two of my favorites; both I have successfully recreated at home with much fanfare. Dal is something I always enjoy whenever an Indian restaurant visit is upon me, but it's not something I had been able to find a recipe for that didn't require me to visit an Indian grocery store. Then while perusing the Food Network website the other day, I came across a Dal recipe created by Wolfgang Puck. I made several alterations to the recipe, but what I ended up with came out quite tasty and fragrant...just ask my coworkers who every day this week have asked me "Ooooh something smells good, what are you eating?"

Ingredients:
2 tablespoons butter
1 1/2 cups diced onions
2 tablespoons minced garlic
2 jalapeno peppers, cored, seeded and minced (I like my dal spicy, so I left the seeds in from 1 of the jalapenos)
1 tablespoon cumin seeds, toasted and crushed
1 teaspoon ground cumin
2 cups red lentils
2 tablespoons finely minced ginger
2 tablespoons Garam Masala (an Indian spice blend that can be found at specialty stores - I like the one from Penzeys)
1/2 tablespoon salt
1 teaspoon ground black pepper
1 tablespoon sugar
1 bay leaf
1 cup diced tomatoes
3/4 tablespoon rice vinegar
32 ounces low-sodium chicken broth

Instructions:
1. In a large pot, melt the buttter and stir-fry the onions just until wilted, do not brown.
2. Add the garlic, jalapeno, cumin, lentils, ginger, garam masala, salt, pepper, sugar and bay leaf. Saute for 1 to 2 minutes, until you can smell of the spices fills your kitchen.
3. Add the tomatoes and deglaze with the vinegar.
4. Add the chicken broth, bring to a boil and then lower to a simmer and cook until lentils are tender, stirring occasionally.

Servings: Makes about 6, 1 1/2 cup (~13 oz) servings

Monday, February 15, 2010

Souffle` Success!

I'm thrilled to report I tried a souffle` recipe again, and this time the results were overwhelmingly successful! What did I change you ask? First, I got an oven thermometer, and it turns out my oven was off by about 30 degrees F! Then, I decided to invest in some smaller, individual-size souffle`dishes since I realized that the life of a souffle` is really about 10 minutes after it comes out of the oven, then it begins to deflate rapidly. The recipe I tried was for roquefort souffle`s. Roquefort is a type of imported, bleu cheese that is sometimes difficult to find. Ask your local cheese monger...they will likely recommend another type of sheep's milk bleu cheese that is a good substitute.


Roquefort Souffle`
Ingredients:
2 tablespoons unsalted butter, plus softened butter for the ramekins
1/2 cup freshly grated Parmigiano-Reggiano cheese
3 tablespoons all-purpose flour
1 cup milk
Pinch of salt
Pinch of cayenne pepper
2 ounces Roquefort cheese
5 large eggs, separated (fresh eggs are the key to your souffle` success-they will puff better during beating and cooking if they are fresh)
2 tablespoons snipped chives

Instructions:
1. Preheat the oven to 375°. Butter four 1-cup ramekins and coat each one with 1 tablespoon of the grated Parmigiano.
2. In a medium saucepan, melt the 2 tablespoons of butter. Add the flour and cook over moderate heat for 1 minute, whisking constantly. Add the milk, salt and cayenne and cook, whisking, until very thick and bubbling, about 2 minutes. Scrape the mixture into a large bowl and whisk in the Roquefort and the remaining 1/4 cup of grated Parmigiano. Whisk in the egg yolks and chives.
3. In another bowl, using an electric mixer, beat the egg whites until firm peaks form. Fold the beaten whites into the cheese mixture until no streaks remain. Pour the mixture into the ramekins, filling them three-fourths of the way; set the ramekins on a baking sheet. Bake the soufflés for about 20 minutes, until puffed and golden. Place the soufflés on plates and serve immediately.

This recipe makes 4 souffle`s. You can also halve it if there are only two people, which is what I did. This recipe was reprinted from Food and Wine Online (http://www.foodandwine.com/recipes/).

Let's Make Some Candy!

Tristan and I are not huge fans of corporate-created holidays which somehow manage to force the masses to go out and purchase flowers and gifts for no apparent reason. What are we huge fans of? Candy, of course! We have never made candy from scratch before, but we decided we would try it out, and boy are we glad we did! We made vanilla caramels and marshmallows, both came out delicious! Check out the recipes below and try em' out!


Vanilla Caramels

Ingredients:
2 sticks unsalted butter
2 1/2 cups granulated sugar
1 cup light corn syrup
1 cup heavy cream
1 vanilla bean, split and seeds scraped
Coarse sea salt, crumbled

Instructions:
1. Line a 9-by-13-inch pan with foil; spray it with vegetable oil. In a heavy saucepan, melt the butter. Add the sugar, corn syrup and cream and bring to a boil, stirring until the sugar dissolves. Add the vanilla seeds. Cook over moderately low heat, stirring, until a golden caramel forms and the temperature reaches 245° on a candy thermometer, 1 hour. Stir in 1 tablespoon of salt and scrape the caramel into the prepared pan. Let cool and set completely overnight.
2. Lightly oil a sheet of parchment paper and line 2 baking sheets with wax paper. Invert the caramel onto the parchment and peel off the foil. Using a sharp knife, cut the caramel into 1-inch-wide strips and then into 1-inch squares. The caramels can also be dipped in melted chocolate and then stored in an airtight container for about a week, maybe longer if you don't mind their increasing firmness. This recipe makes about 7 dozen caramels and takes about 1 hour and 30 minutes to prepare. Reprinted from: Food and Wine Magazine Online (http://www.foodandwine.com/recipes/). 


Alton Brown's Homemade Marshmallows

Ingredients:
3 packages unflavored gelatin
1 cup ice cold water, divided
12 ounces granulated sugar, approximately 1 1/2 cups
1 cup light corn syrup
1/4 teaspoon kosher salt
1 teaspoon vanilla extract
1/4 cup confectioners' sugar
1/4 cup cornstarch
Nonstick spray

Instructions:
1. Place the gelatin into the bowl of a stand mixer along with 1/2 cup of the water. Have the whisk attachment standing by.
2. In a small saucepan combine the remaining 1/2 cup water, granulated sugar, corn syrup and salt. Place over medium high heat, cover and allow to cook for 3 to 4 minutes. Uncover, clip a candy thermometer onto the side of the pan and continue to cook until the mixture reaches 240 degrees F, approximately 7 to 8 minutes. Once the mixture reaches this temperature, immediately remove from the heat.
3. Turn the mixer on low speed and, while running, slowly pour the sugar syrup down the side of the bowl into the gelatin mixture. Once you have added all of the syrup, increase the speed to high. Continue to whip until the mixture becomes very thick and is lukewarm, approximately 12 to 15 minutes. Add the vanilla during the last minute of whipping.
4. While the mixture is whipping prepare the pans as follows:

-Combine the confectioners' sugar and cornstarch in a small bowl. Lightly spray a 13 by 9-inch metal baking pan with nonstick cooking spray. Add the sugar and cornstarch mixture and move around to completely coat the bottom and sides of the pan. Return the remaining mixture to the bowl for later use.
-When ready, pour the mixture into the prepared pan, using a lightly oiled spatula for spreading evenly into the pan. Dust the top with enough of the remaining sugar and cornstarch mixture to lightly cover. Reserve the rest for later.
5. Allow the marshmallows to sit uncovered for at least 4 hours and up to overnight.
6. Turn the marshmallows out onto a cutting board and cut into 1-inch squares using a pizza wheel dusted with the confectioners' sugar mixture. Once cut, lightly dust all sides of each marshmallow with the remaining mixture, using additional if necessary. Store in an airtight container for up to 3 weeks.

This recipe makes about 6 dozen marshmallows (depending on how large you cut them) and takes about 40 minutes to prepare. As you can imagine, the marshmallow mixture is incredibly sticky, so be ready for it! Reprinted from Food Network Online ( http://www.foodnetwork.com/recipes).

Thursday, January 28, 2010

Filets de Poisson Bercy aux Champignons


Julia, you are a goddess. Yes, I acknowledge that I used nearly a stick of butter to create two servings of your Filets de Poisson Bercy aux Champignons (fish fillets poached in white wine with mushrooms, for you non-French speakers), but it was incredible. I have never in my life created something so inconceivably delicious, so breathtakingly magnificent that I was nearly brought to tears. Okay, I realize this may sound ridiculous, but this really felt almost like an out of body experience.

For lack of better words, here is Julia's description of this dish taken directly from page 210 of Mastering the Art of French Cooking: "Bercy is the simplest of the white-wine fish sauces. The poaching liquid is thickened with beurre manie`-a flour butter paste-then enriched with cream."

This dish consists of the following ingredients:

Sliced fresh mushrooms
Butter
Salt
Pepper
Filets of sole or flounder
Shallots
More butter
Dry vermouth
Flour
Even more butter
Whipping cream
More salt and pepper
Lemon Juice
Swiss Cheese
And finally...even more butter!

Rather than reprint the original recipe here, which is about 4 pages in length (yes, Julia was a bit wordy - but she was a genius!), I encourage you to visit your local library or bookstore and find the Julia inside of you just waiting to break free. You won't be disappointed, I definitely wasn't!

Tuesday, January 26, 2010

It's cold, it's raining, it's time for SOUP!!!

I've lived in San Francisco for the past 3 years and somehow every year I manage to forget that when January rolls around, it basically rains for 2 months straight. Now, I am not a huge fan of standing outside umbrella-less in the rain, but I do enjoy snuggling up on the couch with a warm blanket and big bowl of hot soup. Homemade soup is relatively easy to make, the prep time required is often a minimal 20-30 minutes (depending on the amount of veggies needing to be chopped or diced) and most of the cooking time consists of effortless, occasional stirring of a simmering pot of soup. The best part about all of the following soups is that they freeze well and reheat beautifully after an overnight refrigerator thawing. Try a few of them out. My favorites are the Brazilian Black Bean and the Minestrone. Enjoy!

All of the following recipes are based on versions created by Mollie Katzen. I have altered or adjusted some of the ingredients in each recipe.


Brazilian Black Bean Soup
The orange juice and cumin in this soup give it an incredible, tropical flavor.

Ingredients:
2 cups dry black beans, soaked in plenty of water overnight
4 cups water
1 Tbsp olive oil
3 cups chopped white onion
10 garlic cloves, minced
2 1/2 tsp cumin
2 tsp salt
1 medium carrot, diced
1 medium red bell pepper, diced
1 1/2 cups orange juice
3/4 tsp black pepper
1/4 tsp cayenne pepper

Instructions:
  1. Place the soaked bean in a large soup pot (3 quarts or larger) with all of the water. Bring to a boil, cover, and simmer until tender (about 1 1/4 hours)
  2. Heat olive oil in a medium-sized skillet. Add onion, garlic, cumin, salt, and carrot. Saute over medium heat until the carrot is just tender. Add the bell pepper. Saute an additional 10-15 minutes. Add this mixture to the beans.
  3. Stir in the orange juice, black and cayenne pepper.
  4. Puree about 2/3 of the soup in a food processor or blender and then return the puree to the soup pot. Simmer over very low heat 10-15 minutes. Optional: serve with cilantro and fresh salsa.
Servings: Makes 6, 1 1/2 cup (~13oz) servings
Nutrition facts (per serving): 312 calories, 4 g fat, 796mg sodium, 56.3g carbohydrates, 12g fiber, sugars 10.4g, protein 15.8g.


Cream of Tomato
The cloves give this soup a unique flavor. It is unlike any other tomato soup I've had.

Ingredients:
1 Tbsp olive oil
1 1/2 cups chopped onion
2 bay leaves
1/2 tsp salt
freshly ground black pepper
1/2 tsp celery seed OR 1 medium stalk of celery, diced
1/2 tsp ground cloves
2 Tbsp flour
1 28 oz can diced tomatoes, pureed
1 tsp honey
1 cup skim milk

Instructions:

  1. Heat the oil in a large soup pot. Add onions, bay leaves, salt, pepper, celery seed, and cloves and saute over medium heat until onion is soft and translucent (~10 minutes).
  2. Using a whisk, stir constantly as you sprinkle in the flour. Stir continuously and cook 5 more minutes.
  3. Stir in the tomatoes and the honey. Cook over medium heat for 15 more minutes, stirring frequently to avoid sticking.
  4. Turn the heat to a simmer and drizzle in the milk. Remove the bay leaves and serve immediately.
Servings: Makes 6, 1 cup (~8oz) servings
Nutrition facts (per serving): 86 calories, 2g fat, 480mg sodium, 14g carbohydrates, 3g fiber, sugars 8g, protein 3g.

Minestrone

Delicious! I never knew soup could taste this good.

Ingredients:
2 Tbsp olive oil
2 cups chopped onion
5 cloves garlic, minced
1 1/2 tsp salt
2 stalks celery, minced
1 medium carrot, diced
1 small zucchini, diced
1 tsp oregano
3/4 tsp black pepper
1 tsp basil
1 medium bell pepper (any color)
3 cups water
14 1/2oz can tomato sauce
1 cup canned kidney beans (you can use fresh, but you must cook them first)
1 cup dry whole wheat pasta shells (or any other shape you like)
1/2 cup freshly minced parsley
parmesan cheese

Instructions:

  1. Heat olive oil in large soup pot. Add onion, garlic, and salt. Saute over medium heat for 5 minutes, then add celery, carrot, oregano, pepper, and basil.
  2. Cover and cook over very low heat for 10 minutes.
  3. Add bell pepper, zucchini, and water. Cover and simmer 15 minutes. Add beans and simmer 5 more minutes.
  4. Bring the soup to just boiling. Add pasta, stir and cook until pasta is tender (~12 minutes). Serve topped with parsley and parmesan.
Servings: Makes 6, 1 1/2 cup (~12oz) servings
Nutrition facts (per serving): 210 calories, 5.3g fat, 953mg sodium, 33.5g carbohydrates, 8.3g fiber, sugars 7.5g, protein 9.8g.

Thursday, January 7, 2010

Souffle` A` La Disaster

For the past two or three years I have really been working up the courage to tackle the souffle`, a recipe that has been so intimidating I have simply avoided it for fear of utter and complete disaster. I can't really explain the intrigue, I mean for one thing I have never even actually tasted a souffle`; neither a sweet chocolate souffle` nor a savory cheese souffle` has ever passed my lips. I suppose my obsession can be attributed about 40% to the incredible pillowy, mile-high appearance the souffle` takes on when prepared properly, and 60% to the idea that nearly every well-established chef says that making a souffle` is an extremely difficult undertaking.

After much pondering, I set out to purchase the perfect souffle` dish, a task that once completed would leave me with no other choice than to attempt to make a souffle`, because after all, a souffle` dish seems like the ultimate uni-tasker. I settled on the 1 1/2 quart, #7 porcelain souffle` dish from Williams-Sonoma which I am embarrassed to say I dropped $38 and change for...now don't take this the wrong way, I am not the slightest bit fancy. This type of souffle` dish was the only one available at Williams-Sonoma, in both a 1 1/2 and 2 1/2 quart size.

Anyway, I purchased the dish and headed home to create a masterpiece. I had chosen a recipe for Apple Cheddar Souffle` from one of vegetarian guru Mollie Katzen's cookbooks...this was mistake number 1. Not to say that Mollie Katzen doesn't make a wonderful souffle`, because I'm certain she does. However as I mentioned in the previous post, I now own a copy of Julia Child's Mastering the Art of French Cooking which has an entire section devoted to the souffle`-an important fact I did not know until after the said souffle` a` la disaster occurred. I'm getting a bit off track here, back to my actual cooking attempt - the roux of butter, flour, and milk I created was beautiful, the egg whites I whipped formed perfect, stiff peaks that stood on their own as high as Mt. Everest, and the souffle` looked incredible as it baked...

After I took the souffle` out of the oven is where the real trouble began. The top half of the souffle` was pillowy and cake-like, while the bottom half was runny and had not solidified at all. Likely, my oven is not actually 375 degrees F, even though I set it to preheat to that temperature - but since I do not have a thermometer inside the oven to monitor the actual temp, the souffle` was still raw...if either Tristan or I had eaten a souffle` before, we probably would have realized this, but since neither of us have we just started eating it! About 1/3 of the way through, we both looked at each other and admitted it tasted funny. I tried to put it back in the oven, but once you take a souffle` out of the oven, it will apparently never puff back up again.

Needless to say, my first souffle` experience was an utter disaster, ending not with a tasty dinner to savor, but instead with a raw egg induced stomachache and some left over mac n' cheese for dinner. Luckily (or stubbornly, depending on your point of view), I'm not one to give up easily which means I will tackle the souffle` again until I succeed, but not first without studying Julia's souffle` advice section, obtaining a proper oven thermometer and another half dozen eggs!